Day 3 - Running a .NET Core app on a Mac
Disclaimer: I am not on the .NET Core Team. I used the tools available publicly and have no insights into the future of .NET Core. It looks very bright though. :)
The working source code for this project can be found here.
Intro
A complete list of post in this series is included below :
- Day 1 - Installing and Running .NET Core on a Windows Box
- Day 2 - Taking a Look at the Visual Studio Templates for .NET Core
- Day 3 - Running a .NET Core app on a Mac
- Day 4 - Creating a NuGet Package from .NET Core app
- Day 5 - Creating a Test Project from .NET Core
- Day 6 - Migrating an existing .NET Core to csproj
- Day 7 - Creating an ASP.NET Core Web Application
- Day 8 - Using Visual Studio Code with a .NET Core Console Application
- Day 9 - Creating a .NET Core Console App inside of Visual Studio Code
- Day 10 - Using JetBrains Rider with a .NET Core Console Application
In this post, we’re going to look at running the app from the command line and then the Mac.
Running the App in the Windows Command Prompt
While you can obviously run the app inside of Visual Studio with the F5 command. You should also know that you can run the app inside of the console. Before we begin, make sure you have the app found here. After opening the app or downloading it, open the folder containing the project in the command prompt.
You can run your application here by simply typing :
dotnet run
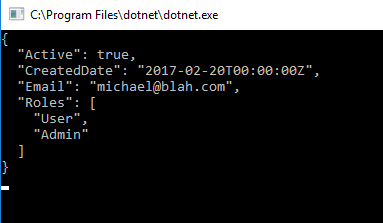
You will the following output :
C:\Users\mbcrump\Documents\visual studio 2015\Projects\NetCoreConsoleApp\src\NetCoreConsoleApp>dotnet run
Project NetCoreConsoleApp (.NETCoreApp,Version=v1.0) was previously compiled. Skipping compilation.
{
  "Active": true,
  "CreatedDate": "2017-02-20T00:00:00Z",
  "Email": "michael@blah.com",
  "Roles": [
    "User",
    "Admin"
  ]
}
The exact same result from running the console app in Visual Studio.

Using dotnet publish to get the app ready for Mac
Go ahead and type dotnet publish on the command prompt and then type tree to look at your directory listing as shown below :
C:.
├───bin
│   └───Debug
│       └───netcoreapp1.0
│           └───publish
├───obj
│   └───Debug
│       └───netcoreapp1.0
└───Properties
You should see the publish directory. Navigate into it and list out the files in the directory :
02/08/2017  06:50 PM    <DIR>          .
02/08/2017  06:50 PM    <DIR>          ..
02/08/2017  06:50 PM             1,417 NetCoreConsoleApp.deps.json
02/08/2017  02:52 PM             6,144 NetCoreConsoleApp.dll
02/08/2017  02:52 PM            13,824 NetCoreConsoleApp.pdb
02/08/2017  06:50 PM               125 NetCoreConsoleApp.runtimeconfig.json
06/13/2016  10:06 PM           468,480 Newtonsoft.Json.dll
06/11/2016  10:14 PM            29,632 System.Runtime.Serialization.Primitives.dll
               6 File(s)        519,622 bytes
               2 Dir(s)   74,699,058,176 bytes free
Take note that the dlls listed below are related to the package reference that we added in the last blog post.
- Newtonsoft.Json.dll
- System.Runtime.Serialization.Primitives.dll
This only leaves the NetCoreConsoleApp.dll which is the Console application that we can run on a Mac (or any other platform that supports .NET Core).
Running the app on a Mac
Finally! It is about time you might say. I agree. Before you can run the app on your Mac, you’re going to need to head back over to the .NET Core downloads page and install OpenSSL and then the SDK (or runtime) if you remember the difference from the first post.
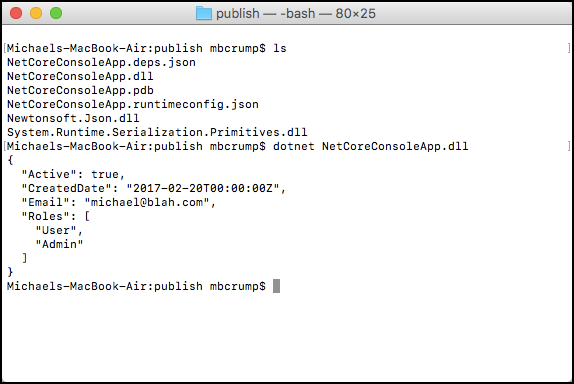
To run this on your Mac, you’ll need to copy the ‘publish’ folder to your Mac. Then open Terminal and you can run the app by just typing :
dotnet NetCoreConsoleApp.dll

This is awesome! Now you have an app that run on another platform and you used your existing .NET skillset to create it. I’m LOVING .NET Core!
Wrap-up
OK, I’m going to take a break and I’ll be back next week. As always, thanks for reading and smash one of those share buttons to give this post some love if you found it helpful. Also, feel free to leave a comment below or follow me on twitter for daily links and tips.

Leave a Comment