
Day 1 - Installing and Running .NET Core on a Windows Box
Disclaimer: I am not on the .NET Core Team. I used the tools available publicly.
Intro
A complete list of post in this series is included below :
- Day 1 - Installing and Running .NET Core on a Windows Box
- Day 2 - Taking a Look at the Visual Studio Templates for .NET Core
- Day 3 - Running a .NET Core app on a Mac
- Day 4 - Creating a NuGet Package from .NET Core app
- Day 5 - Creating a Test Project from .NET Core
- Day 6 - Migrating an existing .NET Core to csproj
- Day 7 - Creating an ASP.NET Core Web Application
- Day 8 - Using Visual Studio Code with a .NET Core Console Application
- Day 9 - Creating a .NET Core Console App inside of Visual Studio Code
- Day 10 - Using JetBrains Rider with a .NET Core Console Application
In this mini-series, I plan to walk you through .NET Core as I learn it. In short, .NET Core runs on Windows, Mac and a couple of distros of Linux. It supports several languages (like C#) and is open-source. If you want to learn more about the differences between .NET Core and the .NET Framework, then I would suggest reading this post.
Installing it
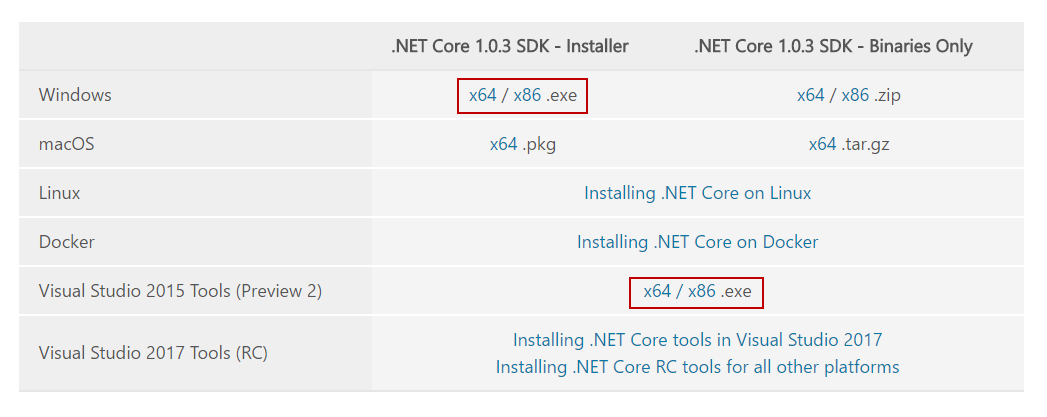
There is a couple of things that might help with installing it. On the downloads page, you will see two options and may not know which one to select. The key takeaway here is that one is for creating and the other is just for running .NET Core apps on a machine :
- .NET Core 1.0.3 SDK - Installer (Includes the tools for creating .NET Core apps)
- .NET Core 1.0.3 SDK - Binaries Only (Only Includes the ability to run .NET Core apps)
You will want to take the “Installer option” for this guide as we will be creating .NET Core apps.
You will also want the option to install .NET Tools for Visual Studio. This will allow us to create a new VS Project using a template. Keep in mind that this only works with Visual Studio 2015 or 2017.
To recap, you installed the following items (depending on your VS version and architecture ) :
Verifying Installation
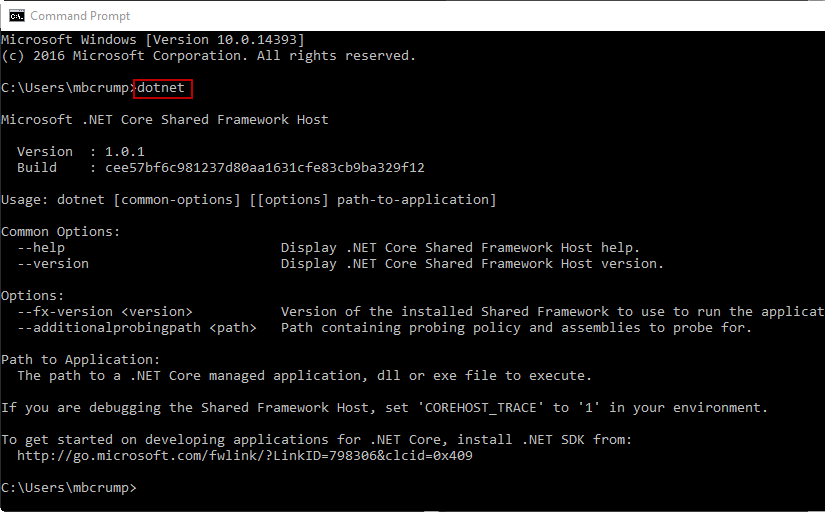
You can easily verify it was installed properly by opening a command prompt and typing:
dotnet
You should see the following :
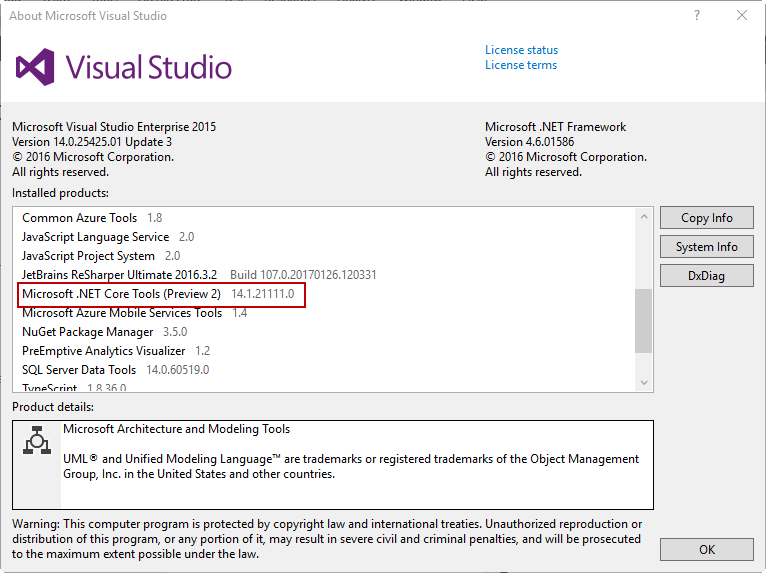
You can test that it was installed in Visual Studio by going to “Help” and “About” as shown below and looking for Microsoft .NET Core Tools.
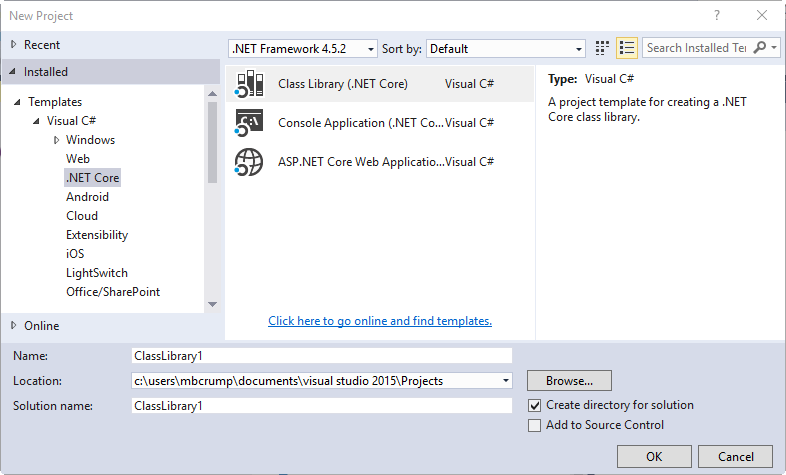
While you are here you can go to File->New Project and look for .NET Core to create a project in Visual Studio.
Kick the tires
I’d suggest starting with the command prompt and typing :
dotnet help
You will see that it list the common commands :
new           Initialize a basic .NET project
restore       Restore dependencies specified in the .NET project
build         Builds a .NET project
publish       Publishes a .NET project for deployment (including the runtime)
run           Compiles and immediately executes a .NET project
test          Runs unit tests using the test runner specified in the project
pack          Creates a NuGet package
Begin with the command :
dotnet new --help
and you will see the following :
Options
  -h|--help             Show help information
  -l|--lang <LANGUAGE>  Language of project [C#|F#]
  -t|--type <TYPE>      Type of project
At this point I’m not sure what types are available so I tried :
dotnet new -t blah
And it listed the available projects which included Console, Web, Lib and xunittest.
To create a new console app, I typed
dotnet new -t console
If I didn’t specify it then it would have created a console app anyways, but we need to get into the habit of specifying the type. I now have a Program.cs file and a .json file. If I examine the Program.cs, then it has the following code:
using System;

namespace ConsoleApplication
{
    public class Program
    {
        public static void Main(string[] args)
        {
            Console.WriteLine("Hello World!");
        }
    }
}
You can modify the code or leave it as is. I’m going to leave it as is.
Now we need to restore the packages (dependencies) by using dotnet restore and we can build it with dotnet build.
Now we need to run it. So I typed dotnet run and the application returned the following:
C:\Users\mbcrump\helloworld>dotnet run
Project helloworld (.NETCoreApp,Version=v1.0) was previously compiled. Skipping compilation.
Hello World!
Yeah, we now see our output from the Program.cs file.
Wrap-up
That’s it for now. As always, thanks for reading and smash one of those share buttons to give this post some love if you found it helpful. Also, feel free to leave a comment below if there is something that you want to know as I learn .NET Core.
Leave a Comment