Enable USB-Debugging with Nexus 5 for Android Studio
Introduction
One of the required tools that you will need when building Android Apps is the ability to debug on a local device. While plugging in the device via USB gives you access to the files stored on the device it does not enable your app to be deployed on it. Let’s see what is required to deploy and test your Android app on a local device. In this case we will be working with the Nexus 5.
Starting with the SDK Manager
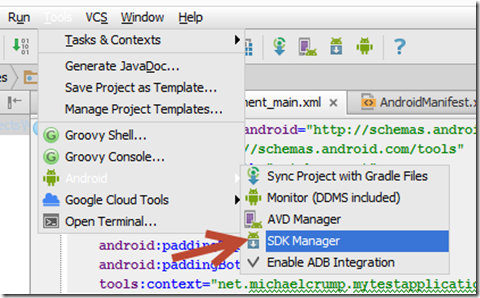
You will need to begin by going to the SDK Manager. Since we have been using Android Studio so far it is just as easy to navigate to it through the IDE by going to Tools->Android->SDK Manager.
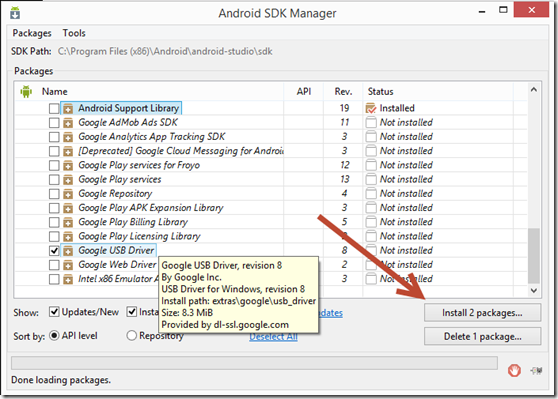
This will open the following dialog prompt and from here you will need to scroll down to the very bottom and look for “Google USB Driver” as shown below.
Note: If you are not using a “Google” based phone you can get the required drivers usually through the manufactures site. (ex. Samsung)
Make sure you place a checkmark in “Google USB Driver” and hit the install packages button.
Installing the Drivers
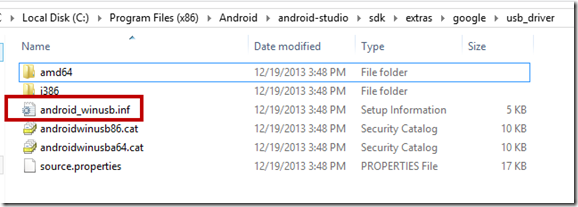
From the screenshot you can tell that it places the files in the “C:\Program Files (x86)\Android\android-studio\sdk\extras\google\usb_driver” folder. But that is all that it does it does not install them.
If you navigate to that folder you will need to right click on the android_winusb.inf file and install the drivers.
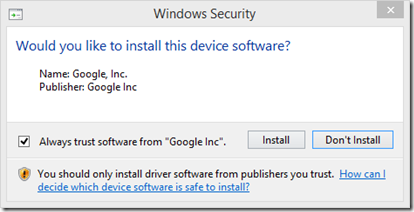
Hit “Install” on this prompt and you are done for the Windows side.
Getting your Device Setup
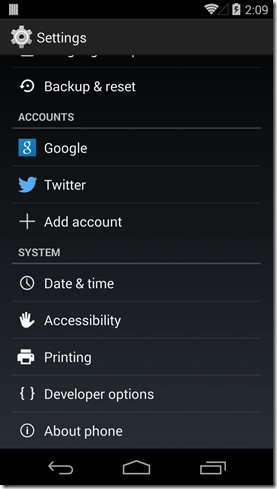
After the drivers are successfully installed on your PC you will need to enable the “Developer Mode” on your Nexus 5. Since you are running KitKat you can do this by going to Settings -> About Phone -> Build number (Tap the build number 7 times.)
If done successfully you will now see the “Developer options” at the bottom of the settings menu.
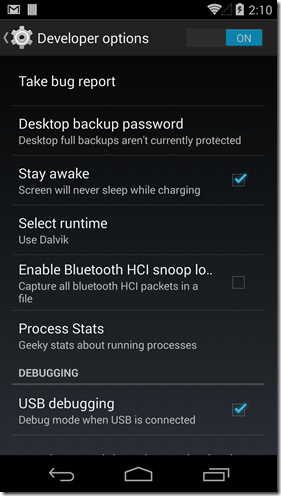
Tap on “Developer options” and place a checkmark in “Stay Awake” and “USB Debugging”.
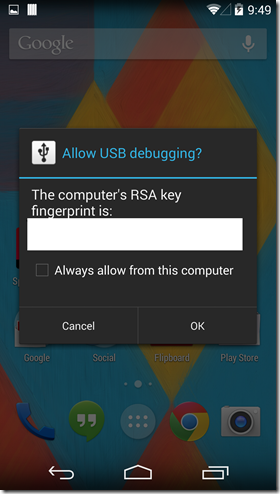
Now connect your device to your USB port on your computer and you should get the following screen:
Place a checkmark in the “Always allow from this computer” and hit “OK”. You are now free to open Android Studio and run your app on your local device!
Wrap-Up
Thanks for reading and if you are interested in learning how to setup your Android Studio Development Environment then just click here.

Leave a Comment