Creating and Debugging C# Console Apps with Visual Studio Code on OSX
Some of my other articles about Visual Studio Code :
- Using TypeScript with Visual Studio Code on OSX
- Setting up Github with Visual Studio Code on OSX
- Automatically Compile Your TypeScript Files with Visual Studio Code on OSX
- Creating and Debugging C# Console Apps with Visual Studio Code on OSX
Grab the Bits
Install Visual Studio Code and ASP.NET 5 for OSX. The Visual Studio installer is straight-forward, but make sure you read the release notes on how to install ASP.NET 5 on a Mac.
Once everything installed, run this command:
yo aspnetYou will see the following options :
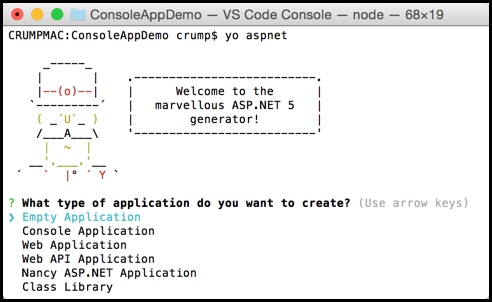
Select a “Console Application” using your up and down arrow keys and give it a name. It will scaffold the project for you.
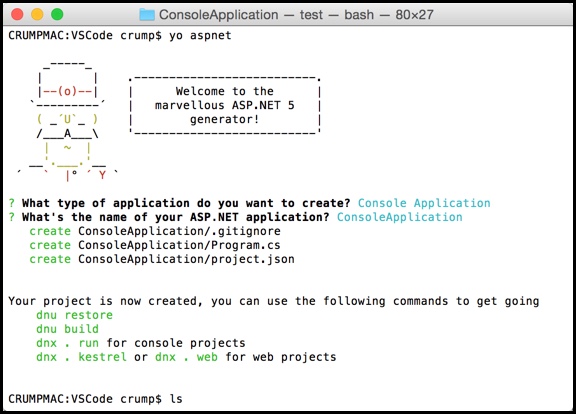
Notice that it is asking you to run a couple of commands :
dnu restore
dnu build
dnx . run
The last command dnx . run is for Console Applications only.
If we list out the files contained in our Console application before running the restore command, then we’ll only see two files and one is hidden:
- Program.cs
- project.json
- .gitignore (hidden)
Change into the directory that has your console app and run the dnu restore command and you now have a project.lock.json file.

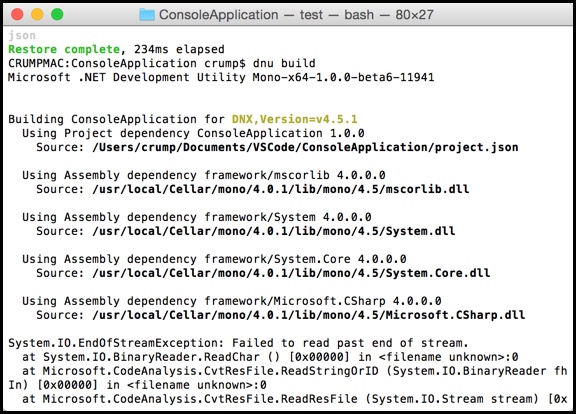
Run the dnu build command and you see several error messages.
Note: You can safely ignore these for this release.
Type dnx . run and the Program.cs file will display “Hello World” in the terminal.
Switch over to Visual Studio Code
Navigate to your Console Project and open it in Visual Studio Code or you can simply type “code .” if your already inside the directory that you want opened.
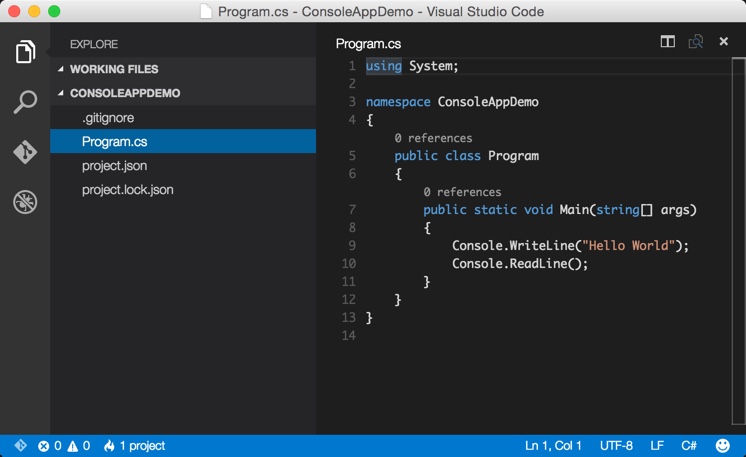
You can run the app by pressing CMD-Shift-P and selecting “Run”. This will open a terminal window that displays “Hello World”.

Digging Deeper
We actually want to build and debug our app, so switch over to Program.cs and press CMD-Shift-B to build our app and you will be asked to configure the Task Runner. Copy and Paste the following text into the file that it opens. (called tasks.json)
{
    "version": "0.1.0",
    "command": "xbuild",
    "args": [
        // Ask msbuild to generate full paths for file names.
        "/property:GenerateFullPaths=true"
    ],
    "taskSelector": "/t:",
    "showOutput": "silent",
    "tasks": [
        {
            "taskName": "build",
            // Show the output window only if unrecognized errors occur.
            "showOutput": "silent",
            // Use the standard MS compiler pattern to detect errors, warnings
            // and infos in the output.
            "problemMatcher": "$msCompile"
        }
    ]
}
This tells the editor to use xbuild instead of msbuild, since we are on a Mac.
If you switch back to Program.cs and hit Control-Shift-B again, then nothing will happen.
Select a line that you wish to debug(1) and press the “Debug Icon”(2) and finally hit the “Play button” (3).
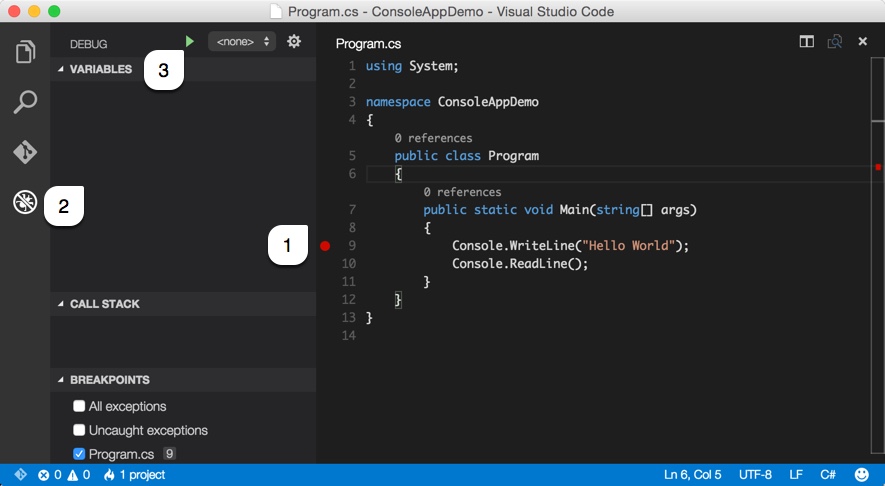
You’ll see a message that asks you to setup the launch configuration for your app.
Switch back over to the files view and you will see a launch.json. Replace the contents with the following:
{
    "version": "0.1.0",
    // List of configurations. Add new configurations or edit existing ones.
    // ONLY "node" and "mono" are supported, change "type" to switch.
    "configurations": [
        {
            // Name of configuration; appears in the launch configuration drop down menu.
            "name": "Debug ConsoleApplication",
            // Type of configuration. Possible values: "node", "mono".
            "type": "mono",
            // Workspace relative or absolute path to the program.
            "program": "ConsoleApplication.exe",
            // Automatically stop program after launch.
            "stopOnEntry": true,
            // Command line arguments passed to the program.
            "args": [],
            // Workspace relative or absolute path to the working directory of the program being debugged. Default is the current workspace.
            "cwd": ".",
            // Workspace relative or absolute path to the runtime executable to be used. Default is the runtime executable on the PATH.
            "runtimeExecutable": null,
            // Environment variables passed to the program.
            "env": { }
        },
        {
            "name": "Attach",
            "type": "mono",
            // TCP/IP address. Default is "localhost".
            "address": "localhost",
            // Port to attach to.
            "port": 5858
        }
    ]
}
Now we’ve declared this as a mono project and gave it a program name to the executable. If we try to debug the application now, it will say :
launch: program '/Users/crump/Documents/VSCode/ConsoleAppDemo/ConsoleApplication.exe' does not existTaking a look at the output window, we will see :
MSBUILD: error MSBUILD0003: Please specify the project or solution file to build, as none was found in the current directory.We are Missing the .csproj file!
We simply need to create a file and call it ConsoleApplication.csproj. I opened a ConsoleProject with Visual Studio and used the following code:
<Project DefaultTargets = "Build"
    xmlns="http://schemas.microsoft.com/developer/msbuild/2003">

    <!-- Specify the inputs by type and file name -->
    <ItemGroup>
        <CSFile Include = "Program.cs"/>
    </ItemGroup>

    <Target Name = "Build">
        <!-- Run the Visual C# compilation using input files of type CSFile -->
        <CSC  Sources = "@(CSFile)"
            DebugType="full"
            Optimize="no"
            OutputAssembly="ConsoleApplication.exe" >

            <!-- Set the OutputAssembly attribute of the CSC task to the name of the executable file that is created -->
            <Output TaskParameter="OutputAssembly"
                ItemName = "EXEFile" />
        </CSC>
    </Target>
</Project>
Now press CMD-Shift-B to build your project. You will see the following files have been created.
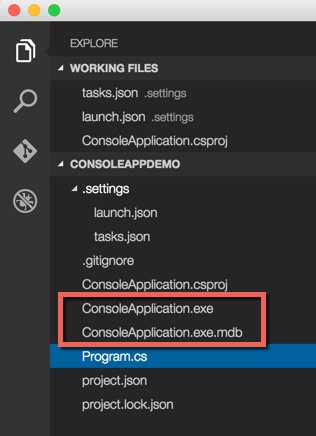
Put a break point on the Console.ReadLine() Method and try debugging the application again. You will now be able to “Step Over”, “Step In”, “Step Out”, “Continue” and “Stop” your console application.
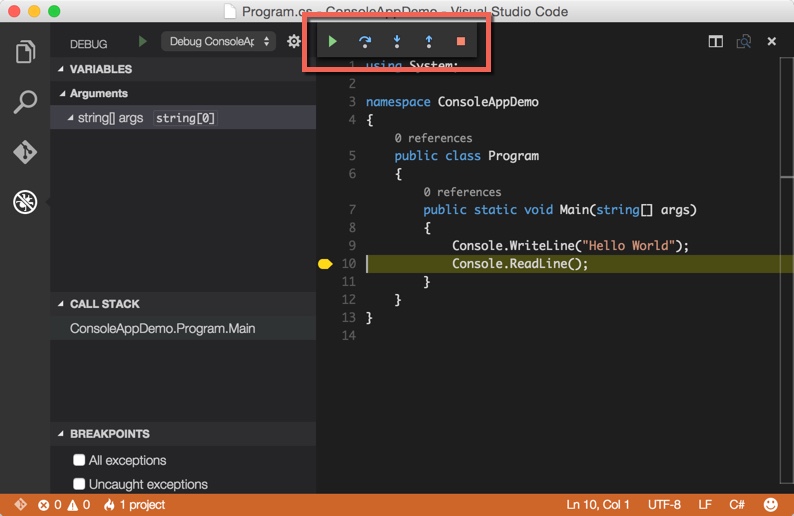
You will also have a terminal window appear that shows the output so far :

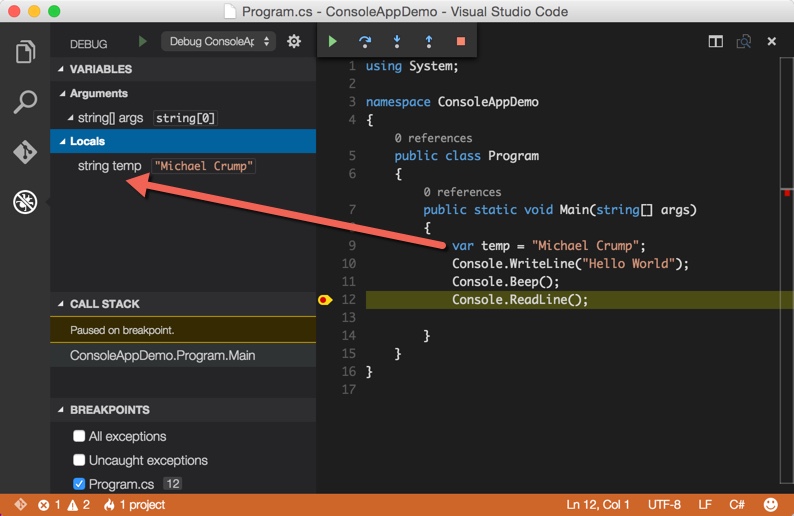
Tweak the boilerplate code if you want to examine how the debugger validates what type a var is, etc. I also thought it was interesting that I could make my Mac beep with the Console.Beep() command even though the compiler says that it is not available in dnxcore50.
Like this Post?
As always, thanks for reading and smash one of those share buttons to give this post some love if you found it helpful. Also, feel free to leave a comment below.

Leave a Comment