Azure Tips and Tricks Part 30 - Working with Log Stream and Azure App Services
Intro
Most folks aren’t aware of how powerful the Azure platform really is. As I’ve been presenting topics on Azure, I’ve had many people say, “How did you do that?” So I’ll be documenting my tips and tricks for Azure in these posts.
The Complete List of Azure Tips and Tricks
Working with Log Stream and Azure App Services
The Log Stream is the ability to see logging information in real-time (or as close to it as possible). You can do this by using the Azure Portal or through some of CLI tooling such as PowerShell or BASH.
In order to take advantage of this, you’ll need to log into your Azure account and go to your App Service that you created and look under Monitoring then you will see Log Stream. Open it and you’ll see the following message Application logs are switched off. You can turn them on using the 'Diagnostic logs' settings.
In order to correct this, we’ll need to go to the Diagnostic logs setting in the same panel.

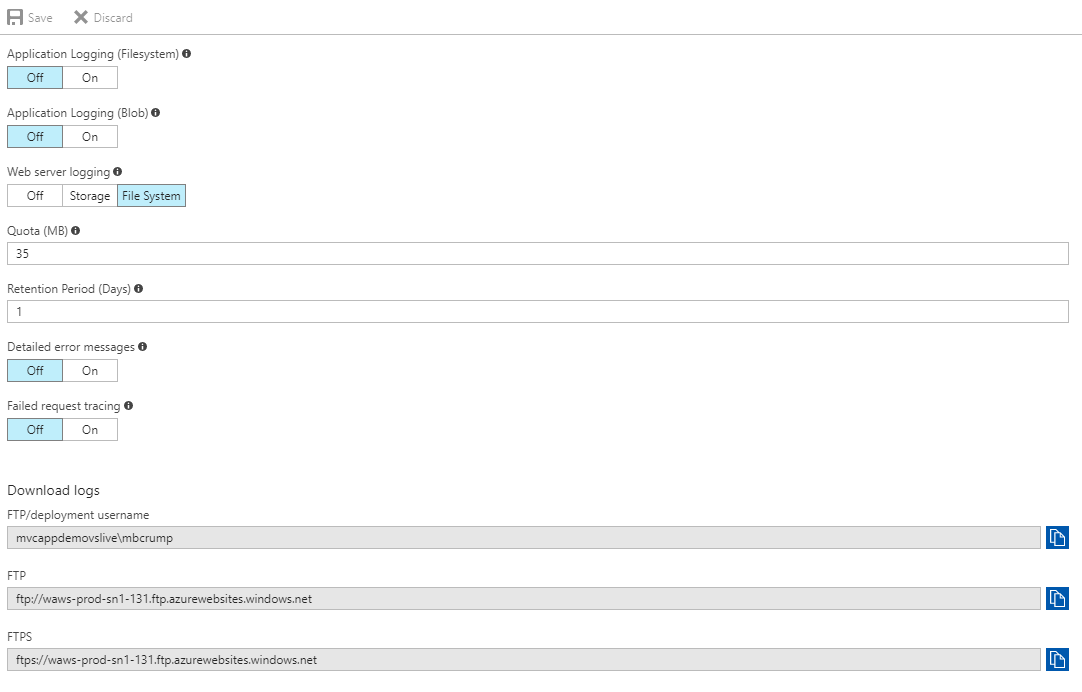
Here you’ll see the following options:
- Application Logging - which allows you to collect diagnostic traces from your web code. This is requrired for the streaming log feature and turns itself off after 12 hours.
- Application Logging (Blob) - logs are collected in the blob container that is specified under Storage Settings.
- Web server logging - Gathers diagnostic information for your web server.
- Detailed error messages - Gathers detailed error messages from your web app.
- Failed request tracing - Gathers diagnostic information on failed request.
Hold Up You can easily change options such as the size of log files that it will keep as well as the number of days to keep the log files in retention. You can also download the log files via FTP and FTPS.
Go ahead and turn Application Logging(Filesystem) to On and the Level to Info press save. Go back and click on the Log Stream setting and visit your web page (that is hosted on *.azurewebsites.net).
You should see the following:

If you look at the first couple of lines, then you’ll see a ReadyForRequest on port 80. Then a request coming from our web browser that includes pulling down the favicon.ico file (which is the only image being sent down).
Adding Trace Logging in Code
If you’re using ASP.NET MVC, then navigate to your appname/Controllers/HomeController.cs file (or wherever you’d like to test this functionality) and add the following line as shown below :
System.Diagnostics.Trace.WriteLine("Entering the About View");
Head back over to Diagnostic logs and change the Level to Verbose press save since we just used a WriteLine command. Switch back over to the Log Stream option and review the Application Log after it calls your Trace.WriteLine command and you should see the following:

Success!
Want more Azure Tips and Tricks?
If you’d like to learn more Azure Tips and Tricks, then follow me on twitter or stay tuned to this blog! I’d also love to hear your tips and tricks for working in Azure, just leave a comment below.

Leave a Comment