Azure Tips and Tricks Part 176 - Azure Lab Services Demystified
ATTENTION: After a solid year and a half of posting 2x a week, I’ve decided to take some time off starting starting December 2018. The series will resume starting early January 2019.
The Complete List of Azure Tips and Tricks
Azure Lab Services Demystified
I was working in the lab late one night
Historically, if you wanted to set up a lab for educational or research use, you’d have to fill a room with identical PCs and load them all with a custom disk image with the OS and software required so that each user has exactly the same experience. Azure already supports hosting virtual machines with custom images, but this doesn’t handle access management, user quotas, etc. With Azure Lab Service, you can build and manage your computer lab in the cloud.
Lab equipment
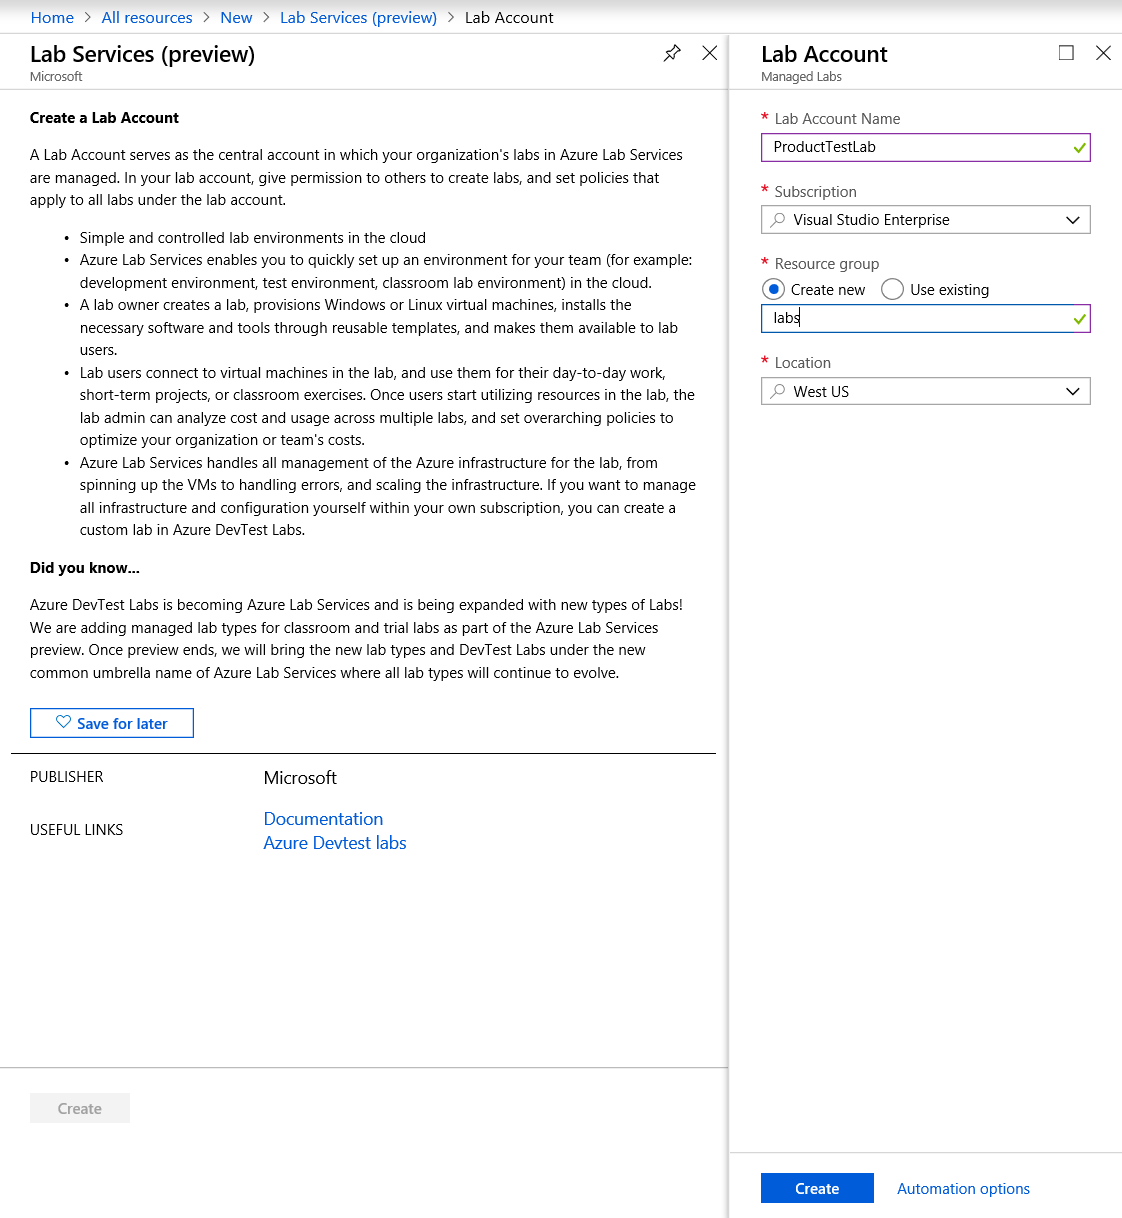
Azure Lab Services does everything you’d expect from a traditional computer lab and then some. Because you’re running on virtual machines, there’s no painful copy-and-install process. Instead, you can scale your lab up easily from a common template. Use the Azure portal to create a new Lab Services account. This must have a unique name and can be in a new or existing resource group.

Unlike most other Azure services, this one has its own portal. You manage the labs through https://labs.azure.com. This is where you set up machines, users, and all other lab settings.

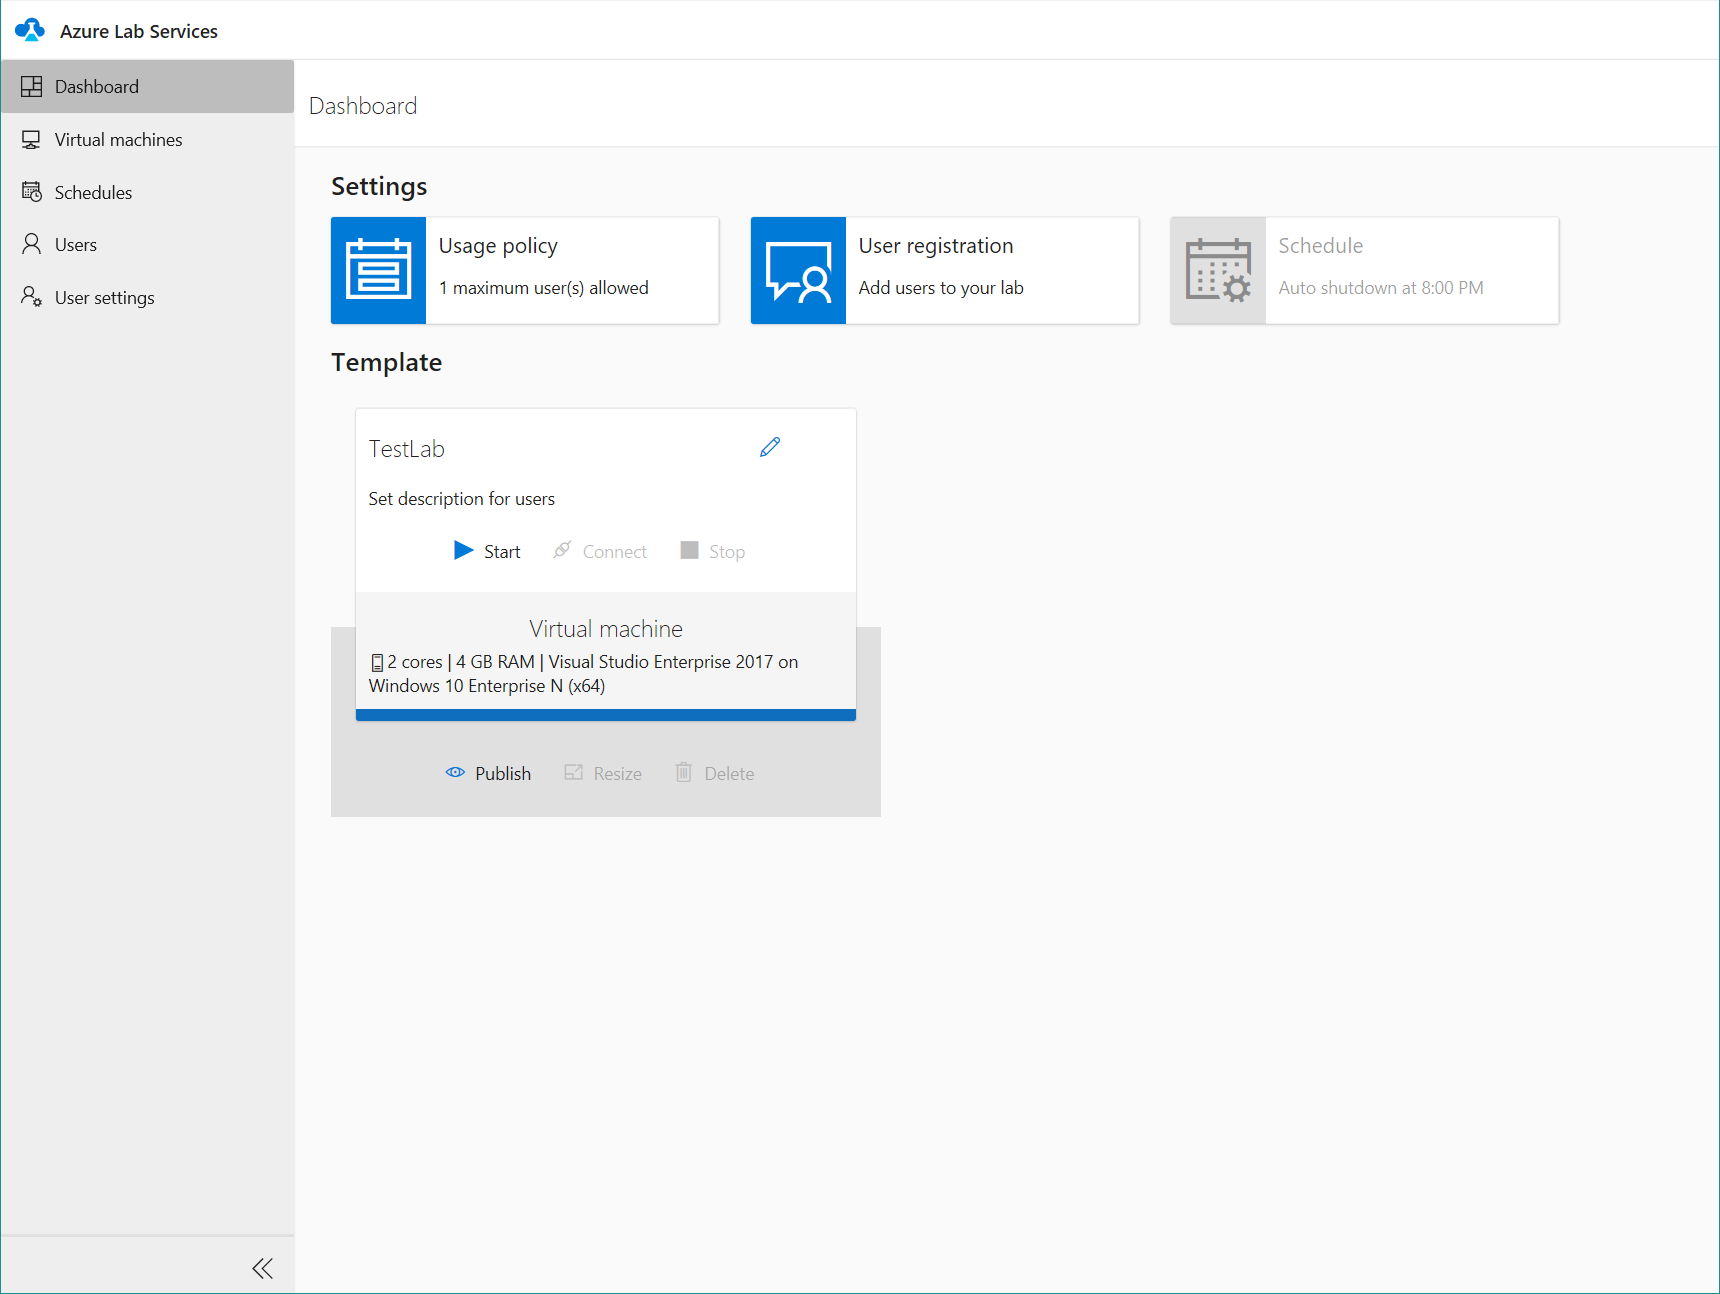
Virtual machine images are created from a range of Windows or Linux OS options, and you can then customize the template image with the require software and settings. You start the template virtual machine, connect remotely, and configure as required. Once you’re done, you can click Publish and then you’re ready to deploy it to multiple virtual machines for your lab. You need to take care at this step because you can’t un-publish a template. You’ll have to start over with a new lab if you need to change the template once published.
You can specify how many concurrent users can be active in the lab, from 1 to a maximum of 100. In addition, you can set a schedule for when the machines are available with auto-shutdown of virtual machines at the end of the session. This is important because if you leave machines running, you’ll be charged for their usage.
Users register with the lab using a unique link that you can distribute to them however you like. This will allow them to connect to an available virtual machine. The admin or educator can monitor which users have registered and see which virtual machines are active and how long they have been active.

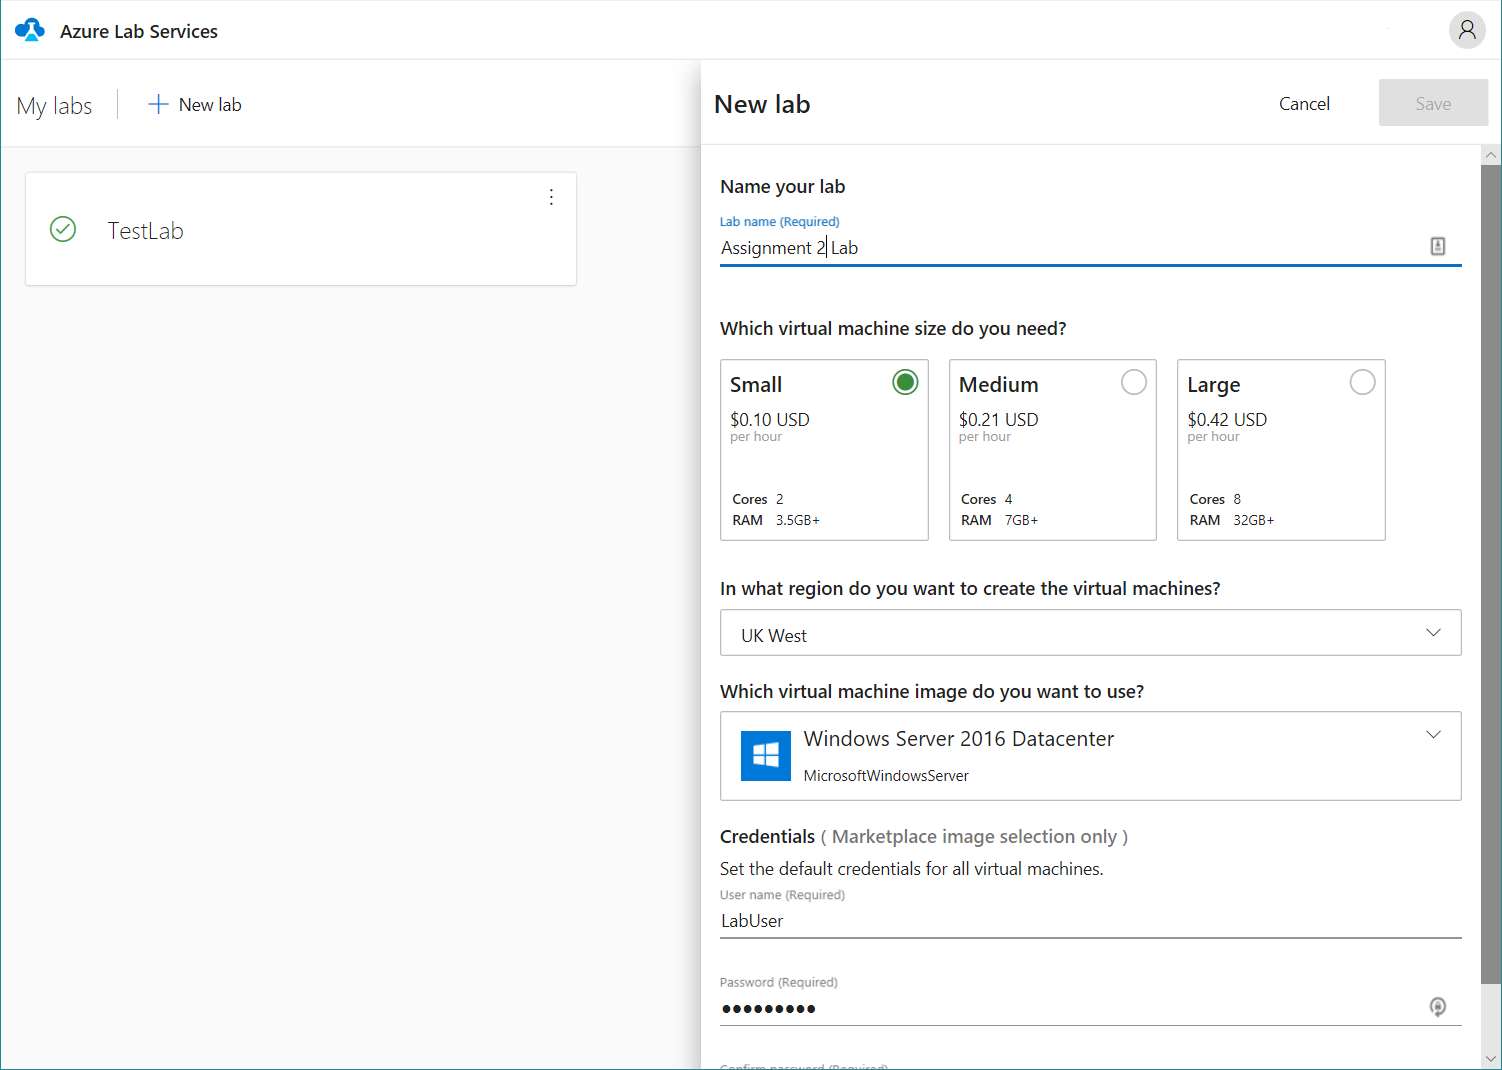
There are three tiers of virtual machine instance you can select from depending on the workload required. The service is billed for the number of minutes each machine is active. You’re not charged for virtual machines that are shut down.
Securing your lab
Lab Services only allows users with the Lab Creator role to create and edit labs. This role is managed through the Azure portal. This means that regular lab users only have access to a virtual machine and can’t make any changes to the lab setup. The virtual machine itself is protected by a default username and password, which the lab creator set on creation, and this has to be shared with valid users in order to access the lab content.
Why should I care?
Beyond just creating a virtual machine image, there is a great deal of admin involved in successfully running a lab. Azure Lab Services manages a lot of this work for you. You can use the service for facilitating classroom labs or providing a controlled environment for customers to trial your software. You can even go beyond the features available here by creating a customized environment with Azure DevTest Labs to deploy to another user’s Azure subscription, respecting their own organization’s restrictions and infrastructure. To deploy your first lab, visit https://labs.azure.com.
ATTENTION: After a solid year and a half of posting 2x a week, I’ve decided to take some time off starting starting December 2018. The series will resume starting early January 2019.
Want more Azure Tips and Tricks?
If you’d like to learn more Azure Tips and Tricks, then follow me on twitter or stay tuned to this blog! I’d also love to hear your tips and tricks for working in Azure, just leave a comment below.

Leave a Comment