Azure Tips and Tricks Part 109 - Day 8 - An end to end scenario with Azure App Service, API Apps, SQL, VSTS and CI/CD
Azure Tips and Tricks Videos are NOW Available! : Get all the goodness of Azure Tips and Tricks in video form. Read more about it here
Intro
Most folks aren’t aware of how powerful the Azure platform really is. As I’ve been presenting topics on Azure, I’ve had many people say, “How did you do that?” So I’ll be documenting my tips and tricks for Azure in these posts.
The Complete List of Azure Tips and Tricks
A multi-part series showing an end-to-end possibility
Crystal Tenn and I teamed up to bring an E2E blog series that features an Azure App Service website that communicates with an API project, which communicates to an Azure SQL back-end. The app is a traditional To-Do application based on an existing sample that used ADO.NET, but adapted for Azure deploy and to Visual Studio 2017. The technology/tooling stack is Visual Studio, VSTS, C#, Angular, and SQL.
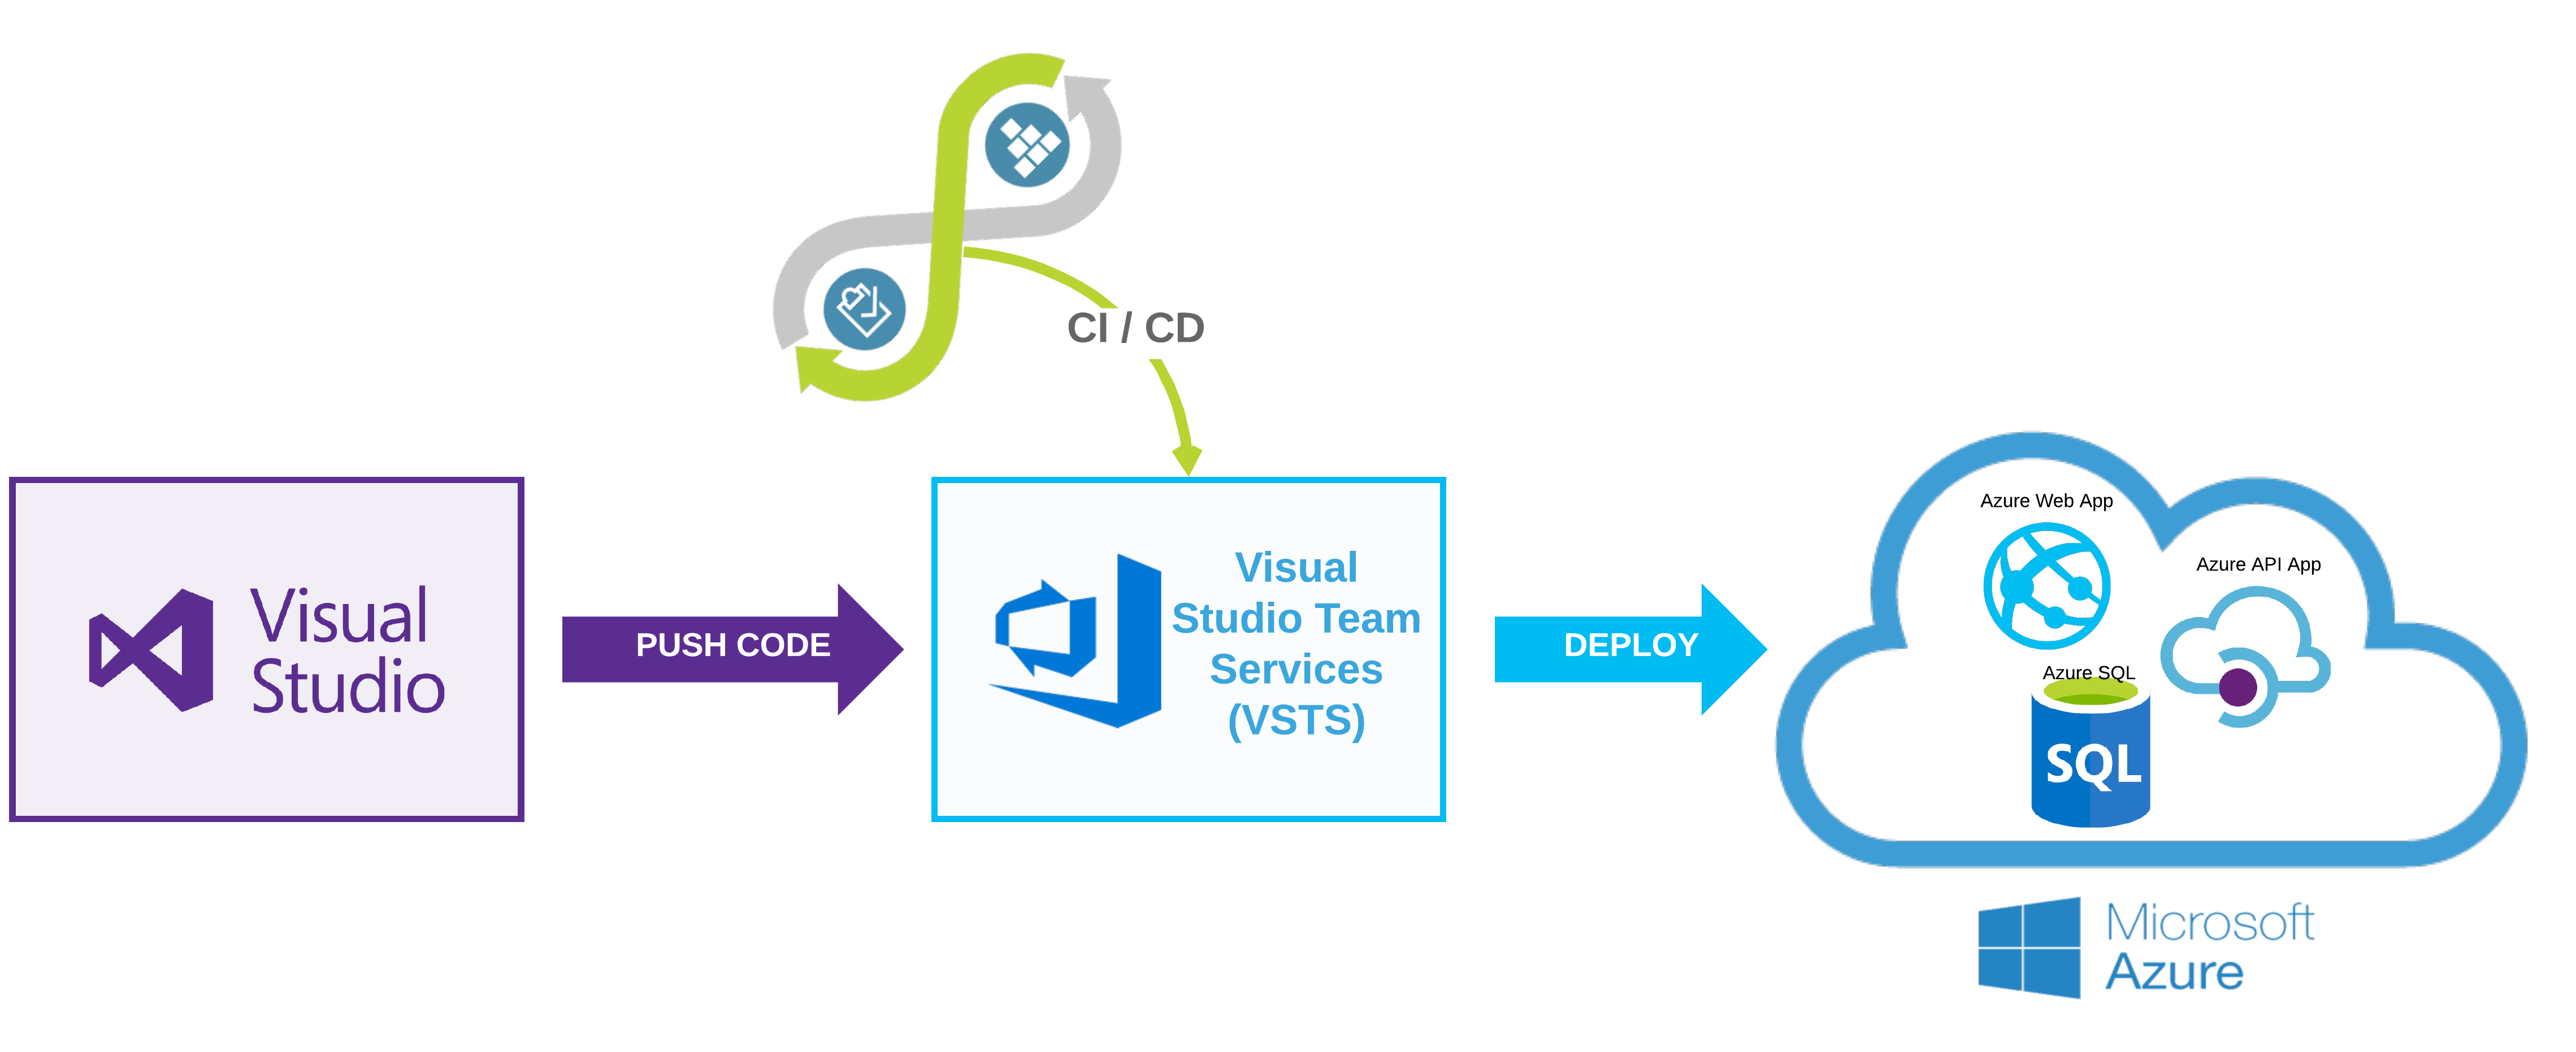
The process for the app is described below. In Visual Studio, you will start out with a working To Do list application. You will push the code to VSTS (Visual Studio Team Services). Then you will create a CI/CD (Continuous Integration/Continuous Delivery) process in order to deploy to Azure. In Azure you will create 3 resources: Azure Web App, Azure API App, and an Azure SQL Server through this exercise.
- Local Setup - SQL Server - Locally connect a front-end website to an API, and connect the API to a SQL Server.
- Local Setup - Visual Studio and Swagger - Continue Part 1 and use a local instance of Visual Studio and Swagger to communicate to our db.
- Swagger - Learn how to use Swagger for API management
- Azure Deployment - Deploy the SQL database to Azure manually
- Azure Deployment - Deploy the front-end Web App and API App to Azure manually
- Adding the project to VSTS with Git
- VSTS Continuous Integration - Setup a CI Process in VSTS
- VSTS Continuous Deployment - Setup a CD Process in VSTS
- Cleanup - Cleanup and delete the Azure resources created in this tutorial
Keep in mind : While we won’t be going into the deep specifics of how to code, you should be able to use this guide to look at several parts of the Azure technology stack and how you can best implement them in your organization.
VSTS Continuous Deployment
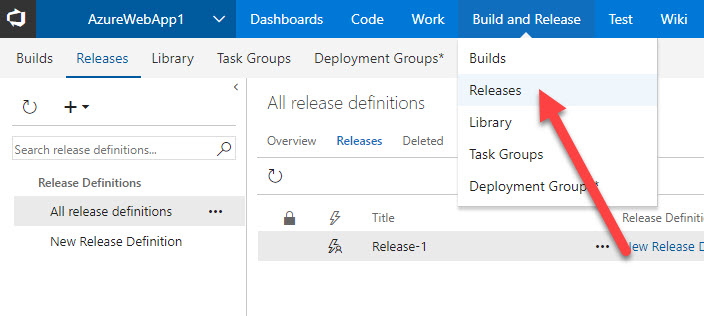
1.) On the top menu of VSTS, click on Build and Release, then choose Releases from the drop-down:
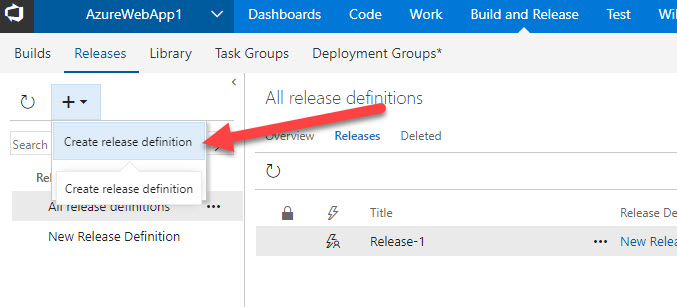
2.) On the left, click the ”+” button and choose Create release definition.
3.) Choose the Azure App Service Deployment template and hit Apply.

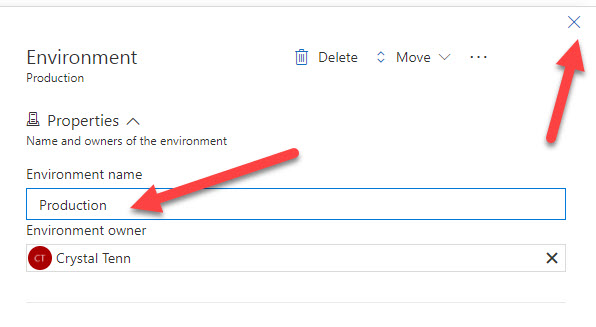
4.) On the right side, name the environment Production, then click the X on the top left to close this.
5.) On the left, click Add artifact.
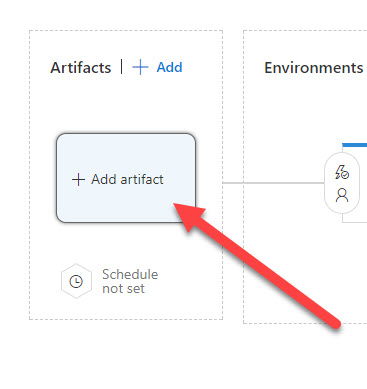
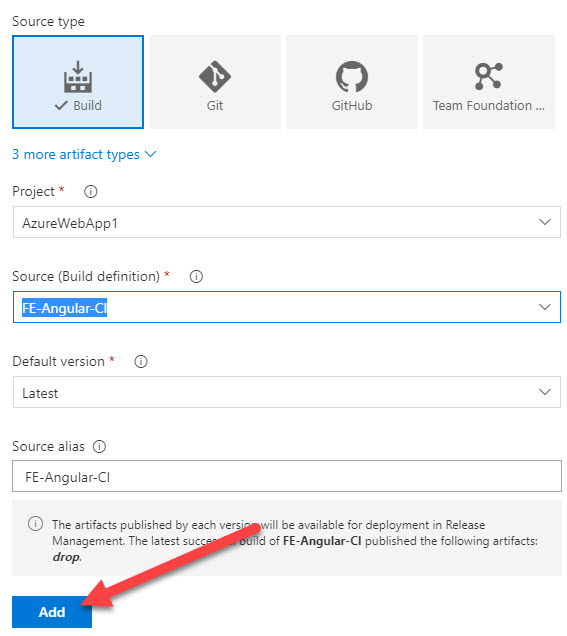
6.) For the artifact, choose Build, and choose the FE-Angular-CI (or whatever it is named) build, hit Add.
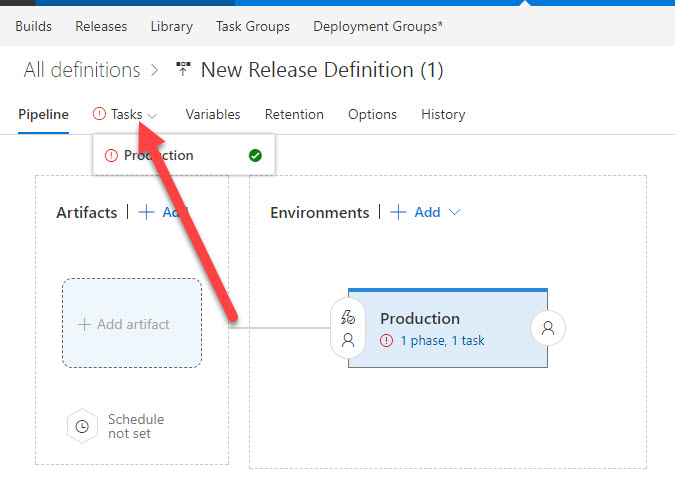
7.) Click Tasks.
8.) Rename your Release definition by clicking by the name:
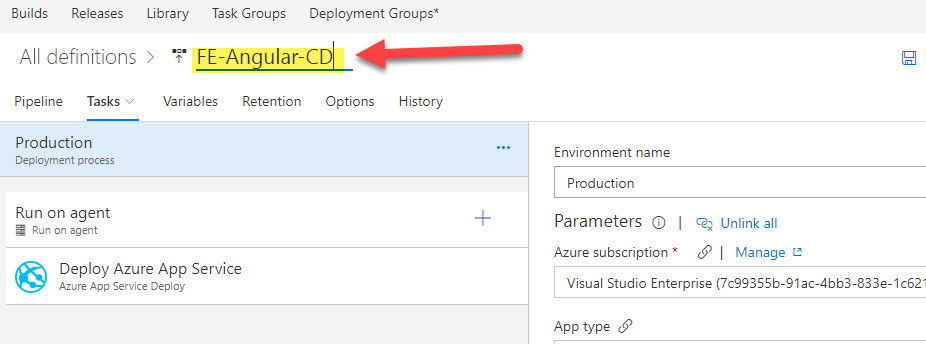
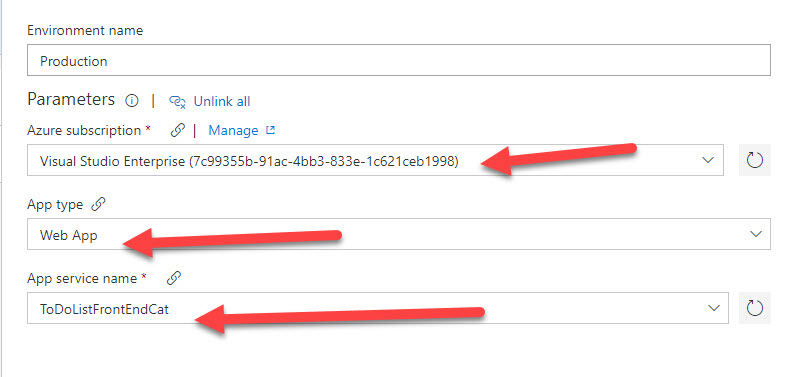
9.) Choose your Azure Subscription. Choose the Web App type. Choose the App Service name you used for the Angular web app.
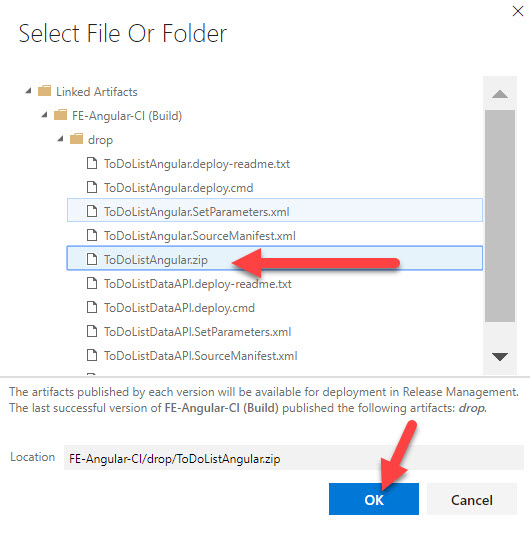
10.) Scroll down more on the same page, click the 3 dots under Package or folder.

11.) On the modal, choose ToDoListAngular.zip, then hit OK.
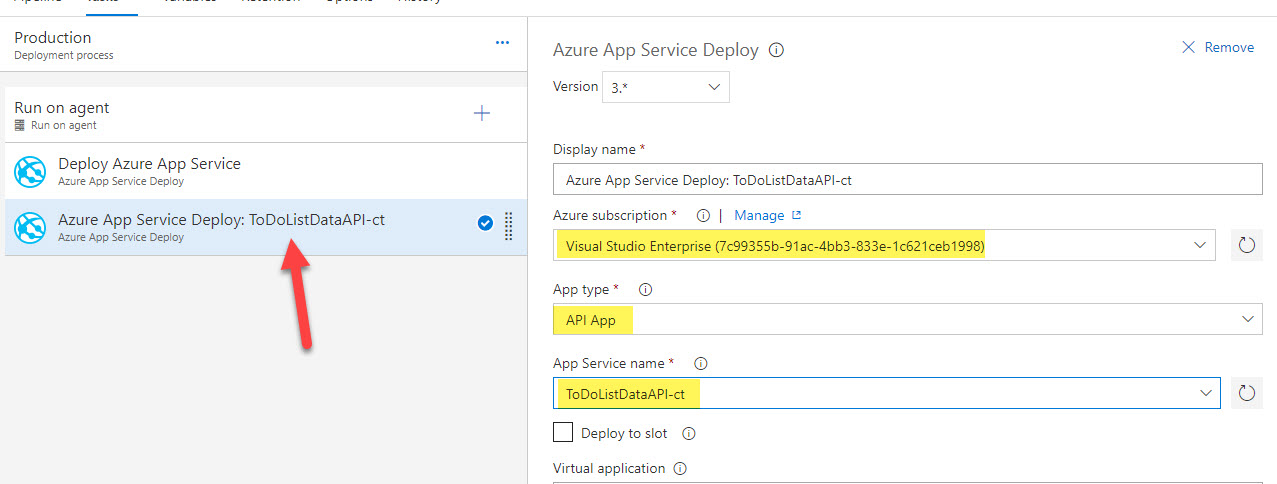
12.) Click the ”+” button to add an additional task. Choose the Azure App Service Deploy task.

13.) Select the new task on the left. Then, on the right add your Azure subscription again. Choose API App. Select the API App Service that you created in the Azure Portal.
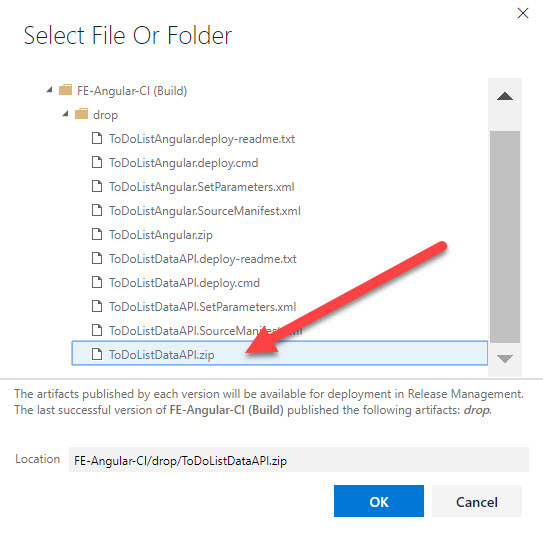
14.) Scroll down on the same task, click the 3 dots under Package or folder.

15.) On the modal, choose ToDoListDataAPI.zip, then hit OK.
16.) Click Save at the top.

17.) Click Release, then Create Release.

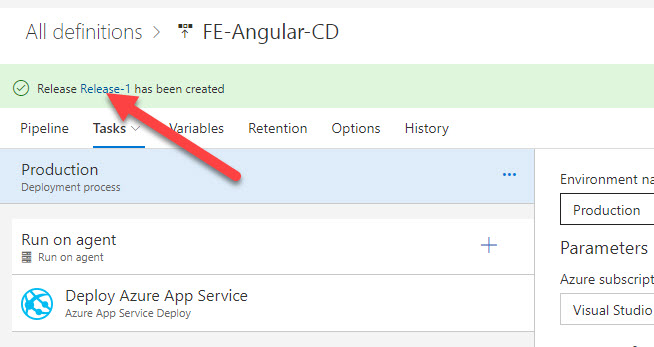
18.) A notification with the name of the release will show up, click on this:
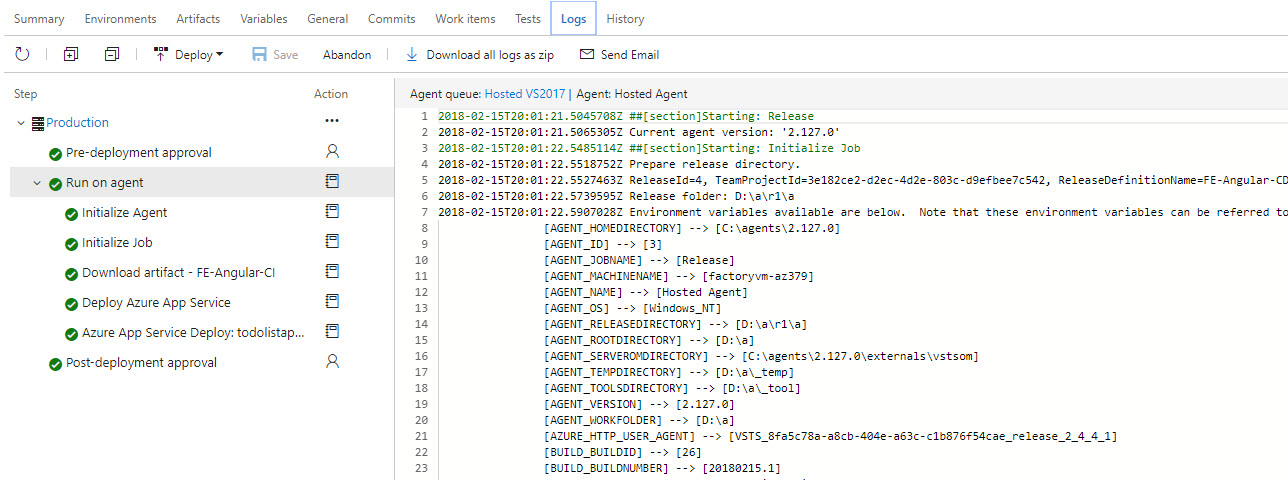
19.) Click Logs, then it will bring you to the logs which will display live results.

20.) Wait until it finishes and shows Success.
21.) Go to your Azure Portal. Choose your resource from All Resources, click on the name of the resource.

22.) View the overview page to get the URL:

23.) Your completed page should look like this (hit the link with the red arrow to go to the To Do list!):

Come back next week and we’ll learn how to delete the resources from this tutorial.
Want more Azure Tips and Tricks?
If you’d like to learn more Azure Tips and Tricks, then follow me on twitter or stay tuned to this blog! I’d also love to hear your tips and tricks for working in Azure, just leave a comment below.

Leave a Comment