A Silverlight Developer’s look at TFS 2010 Remote Hosting.
Full Disclaimer: Since I am on the GeeksWithBlog.NET Influencer list I was issued a free 1-year subscription to DiscountASP.NET TFS2010 remote hosting. With that said the thoughts/opinions located below are my own.
I’ve always like Team Foundation Server. The main thing that I’ve hated about it was installing/maintaining it. I’d rather spend that time learning more about things such as Silverlight/WPF/WP7. I really didn’t know what to expect as we use another source control at work and I’ve never had remote hosting like this. So how did it go? Let’s find out.
Since I’m only getting a free year I decided that before I fall in love with it that I’d better check the prices/feature set. Below is a feature comparison that I thought would be important to someone shopping around for a remote hosted TFS 2010.
| Feature | Cost/Supported? |
| Cost | $20 per user/per month |
| Disk Space | 3GB ($10/month for 1GB extra) |
| Bug/Item Tracking | YES |
| Team Web Access | YES |
| Secure Access with HTTPS | YES |
| Visual Studio 2010 Integration | YES |
| Full Backups | Daily |
The only thing that really mattered to me was cost per user and daily backups. There was a few things that they didn’t support like Reporting SharePoint and RDP but that wasn’t a show stopper for me.
Since my blog targets Silverlight/WPF/WP7 developer’s I decided to share how you would get started using a remote hosted source control and load a Silverlight Project and then load the project inside of Expression Blend 4. This is a tutorial designed for someone new to TFS2010.
Getting started with TFS 2010:
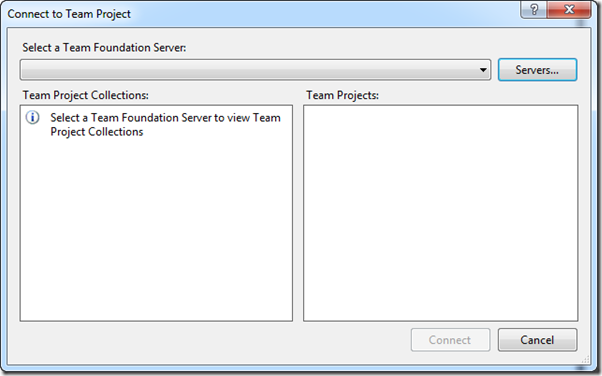
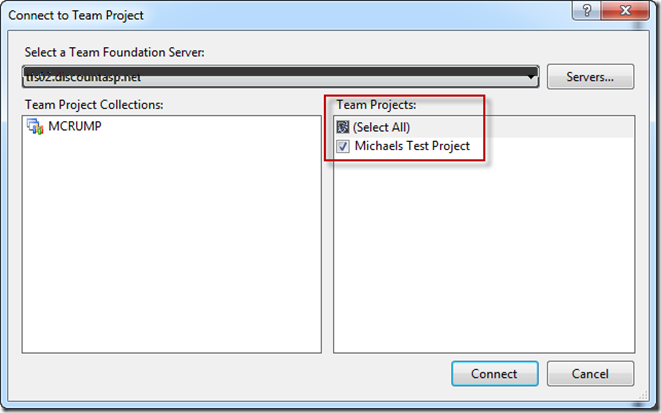
One of the best things about TFS 2010 is that if you already use Visual Studio 2010 Professional then you don’t have anything to install. Simply Hit Team –> Connect to Team Foundation Server as shown below:
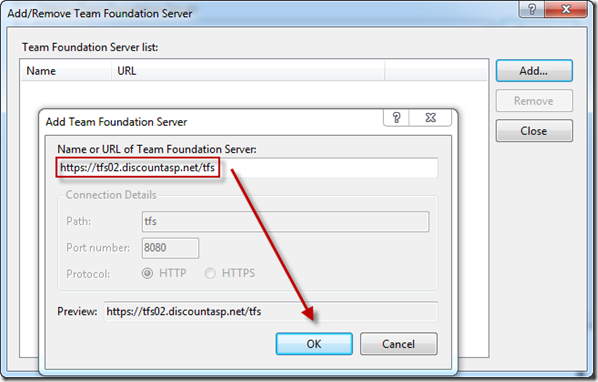
If this is your first time using TFS 2010 then you will need to add your DiscountASP.NET TFS Server Name by clicking the button called “Server” as shown below.
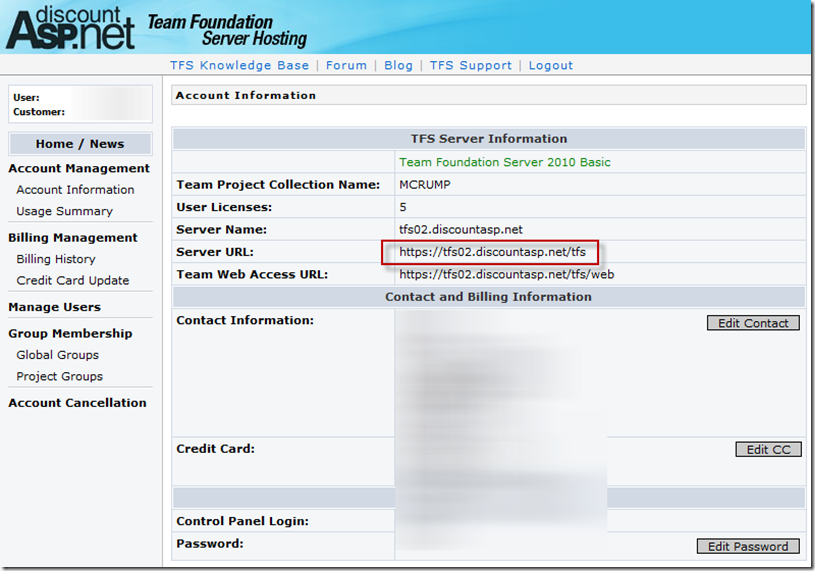
At this point you will simply plug in your server name that you get after you log into your TFS 2010 Control Panel.
The Server Name can be found on the page below. You will add this into the “Add Team Foundation Server” box above.
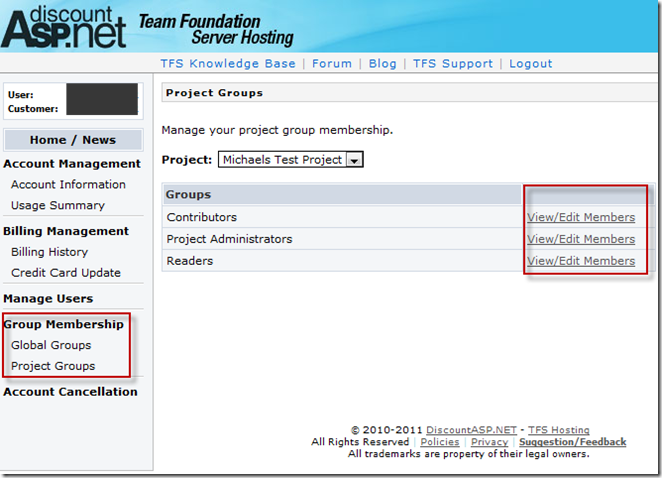
After you add your server you will be prompted to login. This login is created from the “Group Membership” located inside of the DiscountASP.net control panel. This is shown below.
Assuming you have already saved a project you can now begin working on it.
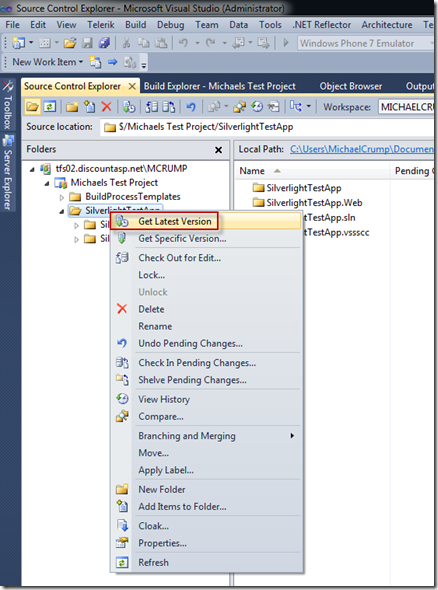
You must map a drive first. You can do this from inside Source Control Explorer and look for Local Path:
After mapping right-click on your project and select Get Latest Version:
Now if I load my project you will notice “Locks” on each item:



Leave a Comment