Setting up Github with Visual Studio Code on OSX
Some of my other articles about Visual Studio Code :
- Using TypeScript with Visual Studio Code on OSX
- Setting up Github with Visual Studio Code on OSX
- Automatically Compile Your TypeScript Files with Visual Studio Code on OSX
- Creating and Debugging C# Console Apps with Visual Studio Code on OSX
Introduction
Visual Studio Code has built in Git support, but very few know how to use it on OSX with GitHub. Even in the official docs, there is only a few paragraphs on it. In this post, I’ll show you how I set it up.
Adding your project to GitHub
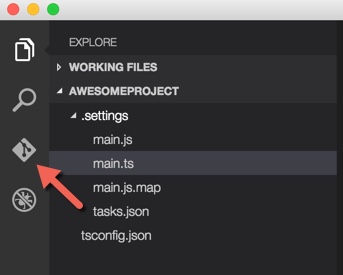
Switch to your project and hit the source control button as shown below.
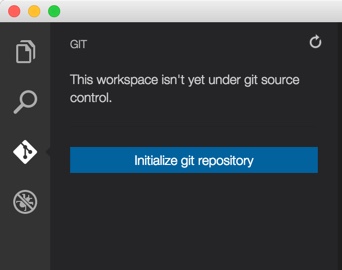
The first thing you will see is that your workspace isn’t under git source control.
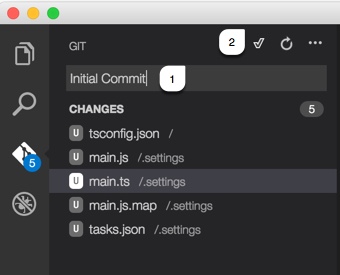
Press the “Initialize Git Repository” button and include a commit message (1) and finally hit the check mark at the top (2).
Your Project is Under Git Source Control, now What?
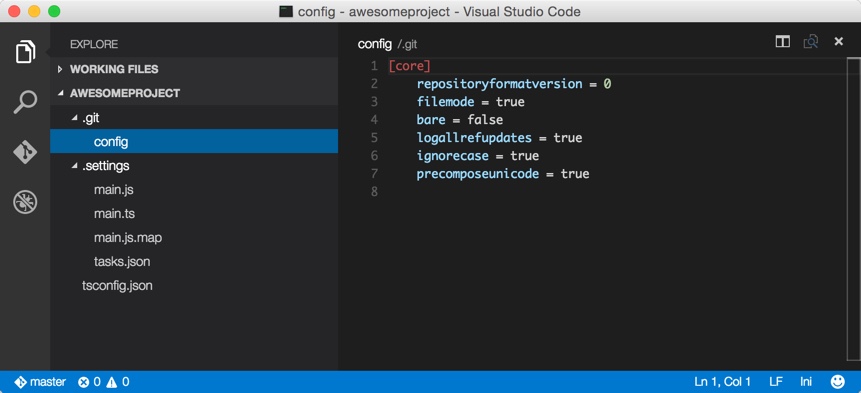
If you navigate back to your project, then you will see a new folder called “.git” and a config file that contains the following :
[core]
repositoryformatversion = 0
filemode = true
bare = false
logallrefupdates = true
ignorecase = true
precomposeunicode = true
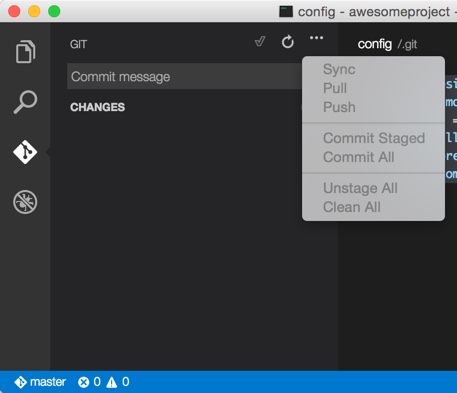
Here is a screenshot of my project :
This is typically the part where you begin a Google Search because you can’t figure out how to get the drop down to populate to push your source to a remote server.
Time to Fix it!
Open github.com and create a Repo. Copy the path to the .git for later use.

Using the terminal, navigate to the location where your Visual Studio Code project is and type the following two commands (replace my .git project with yours) :
git remote add origin https://github.com/mbcrump/SampleProject.git
git push -u origin master
If you examine your .git/config file you will see the following has been added:
[core]
repositoryformatversion = 0
filemode = true
bare = false
logallrefupdates = true
ignorecase = true
precomposeunicode = true

[remote "origin"]
url = https://github.com/mbcrump/SampleProject.git
fetch = +refs/heads/*:refs/remotes/origin/*

[branch "master"]
remote = origin
merge = refs/heads/master
Here is a screenshot of my project :
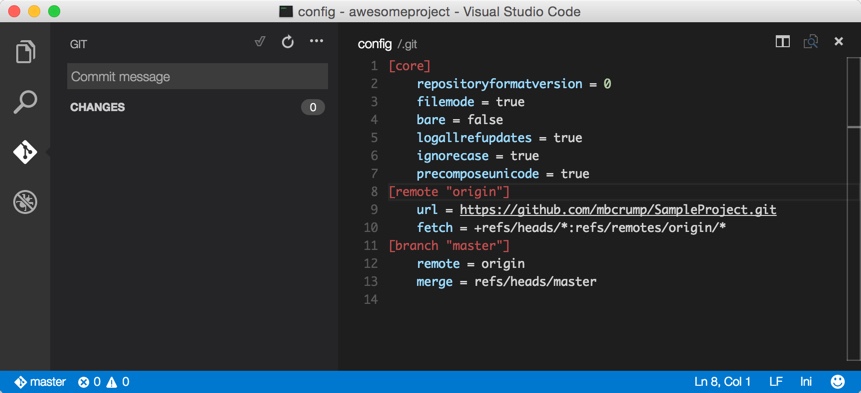
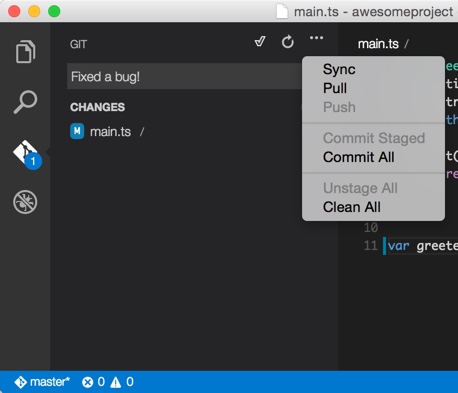
You can now switch back to Git in Visual Studio Code and perform git operations without using the command line. Here is an example of where I modified a file and committed it to a remote server.
Wrap-up
Thanks for reading and if you have any questions or comments, then leave them below. If you are interested in my previous article on Visual Studio Code with TypeScript, then click here.

Leave a Comment