Easily Update to Windows 8.1 Update 1 without Installing all the MSUs Manually
If you are upgrading an existing Windows 8.1 installation to Windows 8.1 Update 1 through your MSDN account then you will need to find the following .zip package for x64.
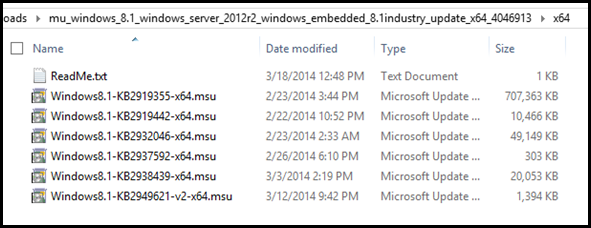
After downloading it you may get frustrated by installing all the MSUs manually from the .zip file as shown below.
You have to install them in a certain order as described in the ReadMe.txt and after each one it prompts you to reboot.
There has to be an easier way:
Create a .bat file and place it in the same folder with all the .msu files with the name “InstallUpdate.bat” and place the following code inside of it:
@ECHO OFF ECHO: Installing KB2919442 START /WAIT ./Windows8.1-KB2919442-x64.msu ECHO: Installing KB2919355 START /WAIT ./Windows8.1-KB2919355-x64.msu ECHO: Installing KB2932046 START /WAIT ./Windows8.1-KB2932046-x64.msu ECHO: Installing KB2937592 START /WAIT ./Windows8.1-KB2937592-x64.msu ECHO: Installing KB2938439 START /WAIT ./Windows8.1-KB2938439-x64.msu ECHO: Installing KB2949621 START /WAIT ./Windows8.1-KB2949621-v2-x64.msu ECHO: Install complete - press any key to reboot. Pause shutdown.exe /r /t 00 exit
After you double click the file the update will start it will prompt you with each file if you want to update or not. Select “yes” and don’t worry about rebooting after every update. Once this is complete reboot your machine and you will have your system up and running on Windows 8.1 Update 1.
If everything installed correctly then you will see the following power and search buttons by your login name once restarted.
I hope this helps!


Leave a Comment