Adding an Application Bar to your XAML Metro Applications.
Introduction
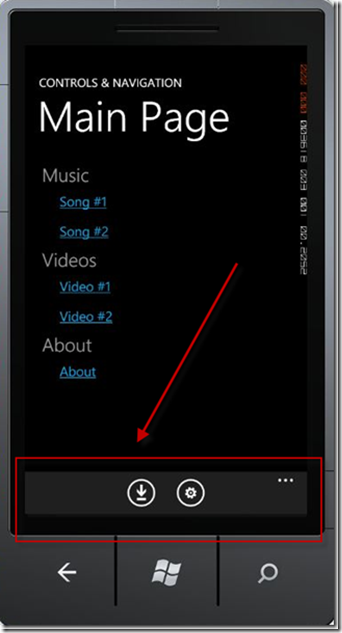
We are all familiar with the Application Bars in Windows Phone 7…
It can be achieved with a few lines of code as shown below:
<phone:PhoneApplicationPage.ApplicationBar> <shell:ApplicationBar> <shell:ApplicationBarIconButton IconUri="/icons/download.png" IsEnabled="True" /> <shell:ApplicationBarIconButton IconUri="/icons/settings.png" IsEnabled="True" /> <shell:ApplicationBar.MenuItems> <shell:ApplicationBarMenuItem x:Name="mnuReturnToHome" Text="return to home" Click="mnuReturnToHome_Click" /> </shell:ApplicationBar.MenuItems> </shell:ApplicationBar> </phone:PhoneApplicationPage.ApplicationBar>
We want to do the same thing with our new XAML Metro Applications. The good news is that it is just as easy as the Windows Phone 7 with a few other cool features.
Let’s get started…
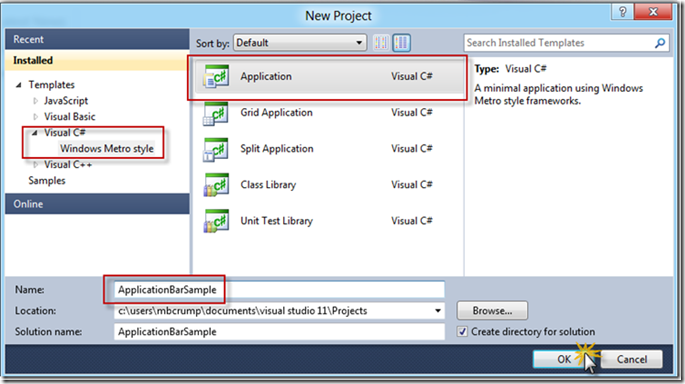
Fire open Visual Studio 11 and select File->New Project. Then select Visual C# –> Windows Metro Style –> Application and give it a name and hit OK.
Once the MainPage.xaml loads then replace the Grid with the following code snippet:
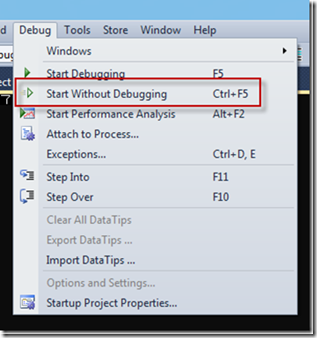
<Grid x:Name="LayoutRoot" Background="#FF0C0C0C"> <ApplicationBar VerticalAlignment="Bottom"> <StackPanel Orientation="Horizontal"> <Button Content="Exit" x:Name="btnExit" /> </StackPanel> </ApplicationBar> </Grid>Now you should be able to run the project with a simple Ctrl+F5 or from the Debug menu.
But you will quickly notice that all you have is a black screen.
Note: Black screenshot added for laughs. ![]()
App bars are transient by default which means they start out hidden and only appear in response to a gesture or in this case a right mouse click. If you right click on the application (if using an emulator or a non-tablet device) you will see the application bar appear.
You can also press CTRL+ALT+A if you are a keyboard kind of guy/gal.
I want my app bar always visible!
You can make the app bars display at all times by setting the IsPersistent property to True.
<Grid x:Name="LayoutRoot" Background="#FF0C0C0C"> <ApplicationBar VerticalAlignment="Bottom" IsPersistant="True"> <StackPanel Orientation="Horizontal"> <Button Content="Exit" x:Name="btnExit" /> </StackPanel> </ApplicationBar> </Grid>
How do you change the way app bars are dismissed?
You can change the way that app bars are dismissed by setting the DismissMode property.
From the documentation:
- The default value is EdgeSwipe which requires an edge swipe gesture right-click or CTRL+ALT+A.
LightDismiss causes the app bar to disappear when the user interacts main part of the app and
TimeDelay causes the app bar to disappear after a specified delay.
In the sample code below you will see that we set two properties. The DismissMode and Delay. (We set this example to hide the application bar after 5 seconds).
<ApplicationBar Background="White" VerticalAlignment="Bottom" DismissMode="TimeDelay" Delay="5000"> <StackPanel> <Button Content="Bottom" Background="Black" /> </StackPanel> </ApplicationBar>
Is my app bar limited to the bottom?
No You may change the VerticalAlignment to any of the following values. The only one that I found beneficial was the Top or Bottom.
As you can see several options exist.
Can I have both a Top Application Bar and a Bottom Application Bar?
Sure just add in the code similar to the following:
<Grid x:Name="LayoutRoot" Background="#FF0C0C0C"> <!--Top App Bar--> <ApplicationBar Background="White" VerticalAlignment="Top" DismissMode="TimeDelay" Delay="5000


Leave a Comment